Editing Schedule Items
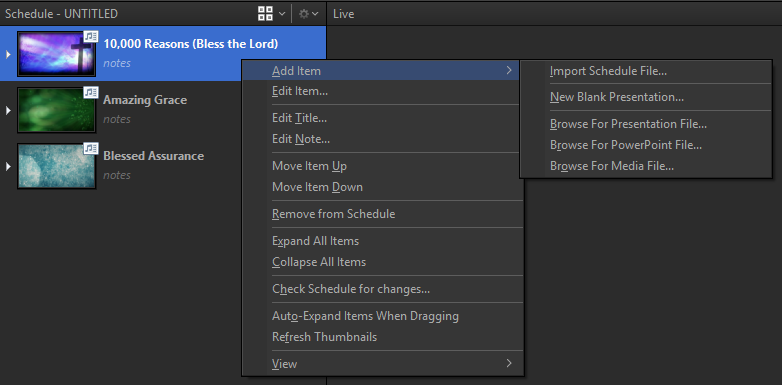
When editing the Schedule, you have the following options from the right click menu.
|
Add Item > |
|
||||||||||
|
Edit Item... |
Opens the selected item in the Schedule Editor. SEE Edit A Song In The Schedule. |
||||||||||
|
Edit Note... |
Allows you to add a note about a particular Schedule item. This option is grayed out when in Summary View |
||||||||||
|
Move Item Up |
Moves the selected schedule item up. |
||||||||||
|
Move Item Down |
Moves the selected schedule item down. |
||||||||||
|
Expand All Items |
Expands all schedule items. |
||||||||||
|
Collapse All Items |
Collapses all schedule items. |
||||||||||
|
Check Schedule for changes... |
Allows you to bring any changes you made to a song or presentation in the schedule into the database. It also allows you to import media items from the schedule that are not in your list of media items. SEE Check Schedule for Changes for more information. |
||||||||||
|
Auto-Expand Items When Dragging |
When moving media around in the schedule, select this option to expand any media item automatically when hovering over it while dragging another media item. |
||||||||||
|
Refresh Thumbnails |
Refreshes the thumbnail images displayed in the Schedule area. |
||||||||||
|
View |
Allows you to display the schedule in small icons, medium icons, large icons, or as a summary. |
Check Schedule for Changes
After making changes to a presentation or song within the schedule, EasyWorship allows you to save those changes to the media item in the database. Additionally, if you are using an item in your schedule that doesn't currently exist in the database, you can also import those items for future use.
- Right-click in the Schedule area and select Check Schedule for changes.... The Import schedule items window appears.
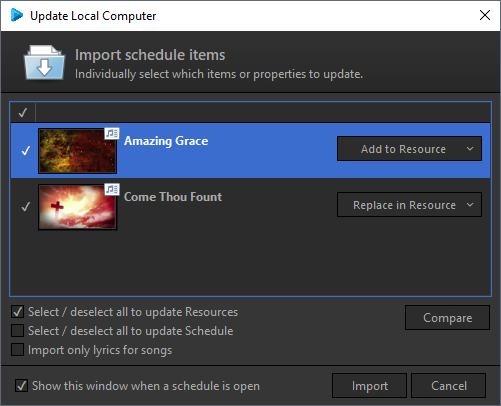
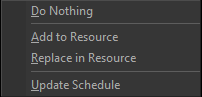
- Select the desired item and use the button on the right to either Do Nothing, Add to Resource, Replace in Resource or Update Schedule.
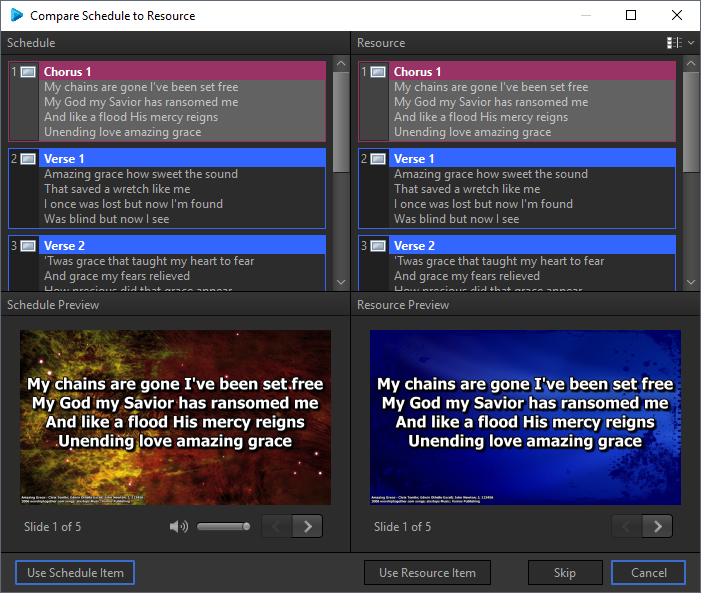
- You can also click Compare to display a comparison between the version in the database and the version from the schedule. The Compare Schedule to Resource window will appear.
- Click Import to import the changes or Skip to skip this schedule item and move to the next one.
Schedule Editor
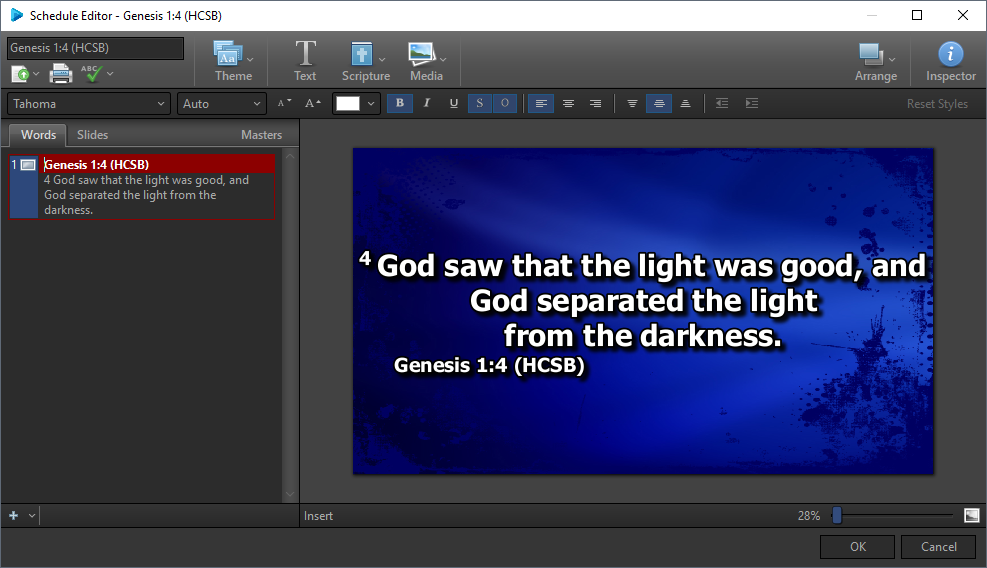
Schedule Editor Toolbar
|
|
|
|
Title |
Enter a name for the song, scripture, theme, or presentation in this field. |
|
Theme |
Use the drop-down to select a theme. (This option is grayed out in the Theme Editor.) |
|
Text |
Adds a text box to display on each slide. |
|
Scripture |
Click the scripture button to select scripture text and press enter or drag it to add it to the theme. |
|
Media |
Click the media button to select videos, images, feeds, DVD clips, or audio and press enter or drag it to add it to the theme. |
|
Arrange |
Clicking this button allows you to set the layer at which the selected element resides. You have the option of Move Up, Move Down, Bring to Front, Send to Back. |
|
Inspector |
Opens the Inspector window. This allows you to make more detailed formatting changes to different elements. |
|
Import |
Allows you to import a text document into your song, presentation, or theme. |
|
|
Allows you to print the song, schedule, theme, or presentation. |
|
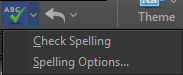
Spell Check |
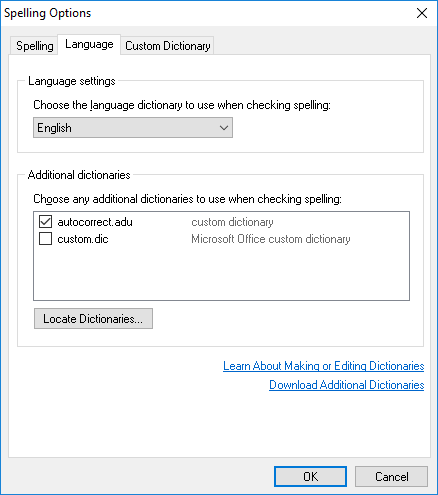
Checks spelling and allows you to make spelling changes or add words to the dictionary. To add a language to the spell check dictionary, click the Spell Check button and select Spelling Options....
|
|
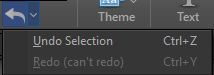
Undo / Redo |
Click to undo previous functions. Click the drop-down arrow to redo functions that you clicked to undo. |
|
Font Selector |
Click the font selector to select the font formatting you wish to use on selected text. |
|
Auto Sizing |
Allows you to choose between setting an exact font size or automatically sizing the font. |
|
Font Size |
Changes the font size of the text to the point size selected. |
|
Font Color |
Allows you to change the color of selected text by selecting from the color palette provided. |
|
Text Style Options |
Bold, Italics, Underline, Shadow, Outline |
|
Horizontal Alignment Options |
Left Align, Center Align, Right Align |
|
Vertical Alignment Options |
Top Align, Middle Align, Bottom Align |
|
Indent / Outdent |
Increase or decrease the indent level of the paragraph. |
|
Reset Styles |
Resets formatting to default settings. |

Schedule Editor Tabs
The Words tab or Slides tab can be used to enter or edit text as needed.
The Words tab will display only the text on the left with the Slide Editor on the right.
The Slides tab displays a thumbnail of the slide on the left, with the Slide Editor on the right. In this view, you can change the text and slide background. You can also select multiple slides to edit, duplicate, or delete.
To use the same background for all slides, select the Masters tab and select the master slide, which will be the first slide. Click the Inspector button to open the Inspector. Select the Background tab in the Inspector to change the background.
To use a different background for individual slides, click the Slides tab. Click Media on the toolbar and drag-and-drop the image or video to the desired slide on the left.