Create A New Profile
EasyWorship will create a default profile automatically when it is installed. If another set of data or settings is desired, creating a new profile can accommodate this need.
- Click Profiles > Profiles Manager.
- The Profile Editor screen appears.
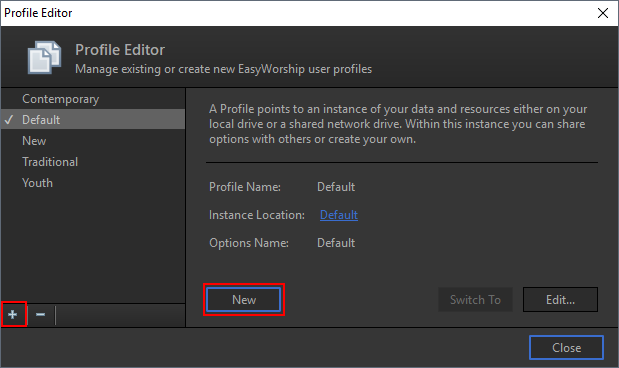
- Click New or the Add
 button to open the Add Profile menu.
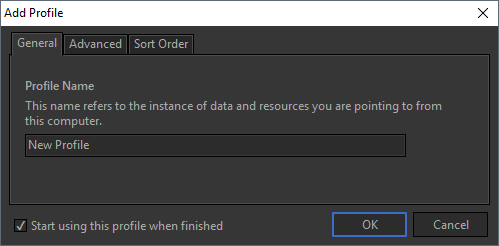
- Enter a name for the new profile (e.g., Youth, Pastor, Children, Spanish, etc.). The default name is New Profile.
- The "Start using this profile when finished" option is checked by default. If you do not want to use the profile immediately, uncheck this option.
- Click the Advanced tab.
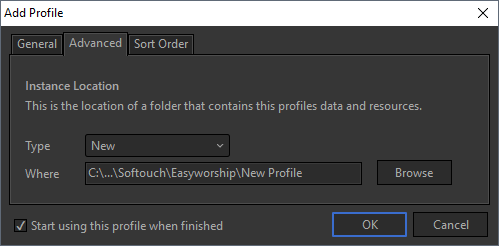
NOTE The default path for the database in Windows will be located in C:\Users\Public\Public Documents\Softouch\EasyWorship.
- Click the Type drop-down menu box to specify if you want to create a New profile or use an Existing profile.
- To connect to a shared network database or to a different location on your computer, choose Existing from the Type drop-down.
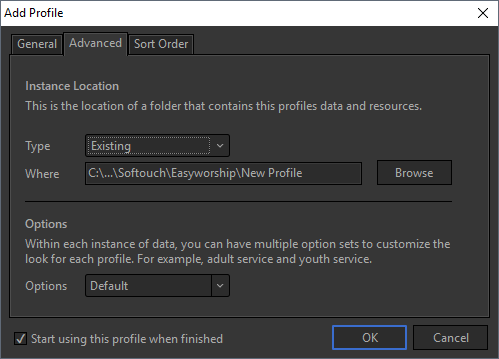
- Click Browse to the right side of Where. This will open the Browse for Folder window.
- Navigate to the shared profile folder. For network databases, browse to [Network Computer Name (e.g., WorshipPC)]\ Users\Public\Public Documents\Softouch\EasyWorship\, or other location on your computer.
- Select the profile folder (e.g., Default or Youth).
- Under Options, type in the name you want to use for this profile's options, or select a name from the drop-down list.
- If you're using EasyWorship in a language other than English, click on the Sort Order tab.
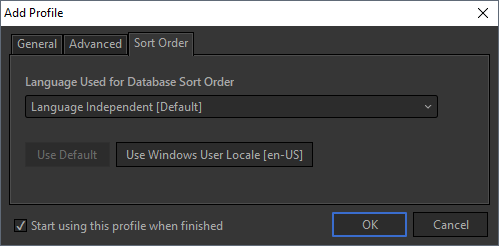
- Select your language in the drop-down menu so EasyWorship will sort your database items correctly for your language. Select if you want to use the Default sort order for your language or use the Windows User Locale.
- Click OK to create the new profile.
NOTE If you did not uncheck "Start using this profile when finished", clicking OK will take you to your new profile.
NOTE If you did uncheck that box, clicking OK will take you back to the Profile Editor window. From here you can click Close if you're finished. Otherwise, you can create another New profile, Edit a profile, Delete a profile or Switch To another profile.