Inspector format
Formatting Text Box:
Slide Tab
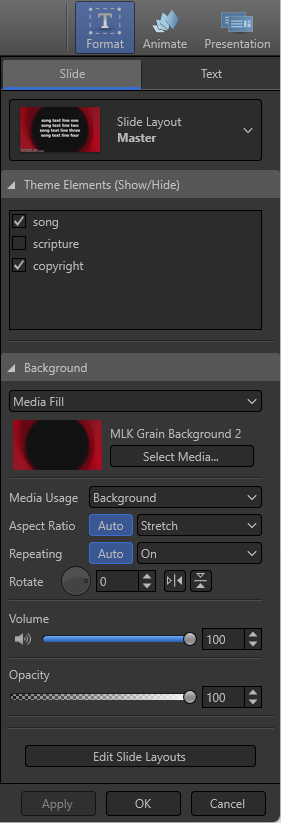
If you don't have an element selected on the slide and you're in Words tab, under Format, you will see the Slide and Text tabs.
|
Slide Layout |
Click the drop-down menu to select or change the Theme of your song, presentation, or Scripture. |
|
Theme Elements |
Select or De-select the elements you want displayed on the slide. |
|
Background |
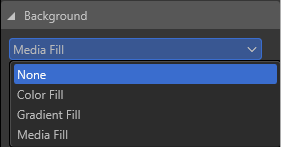
From the drop-down, select your desired background format: None Color Fill Gradient Fill Media Fill
|
|
Background: None |
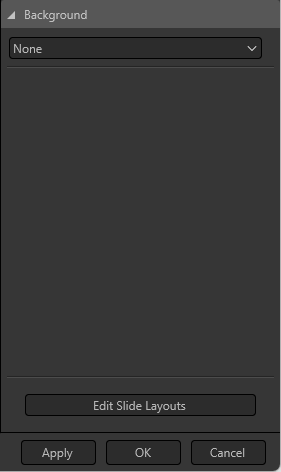
When selecting None, nothing else is available to choose.
|
|
Background: Color Fill |
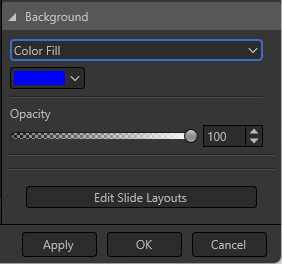
When selecting Color Fill, click the dropdown to select your desired color and then choose the opacity.
|
|
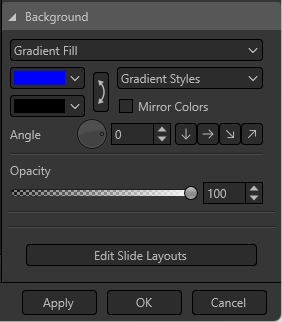
Background: Gradient Fill |
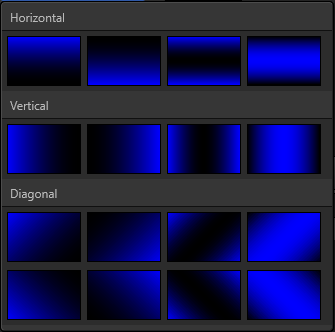
When selecting Gradient Fill, choose the two gradient colors, the gradient style, angle, and opacity.
|
|
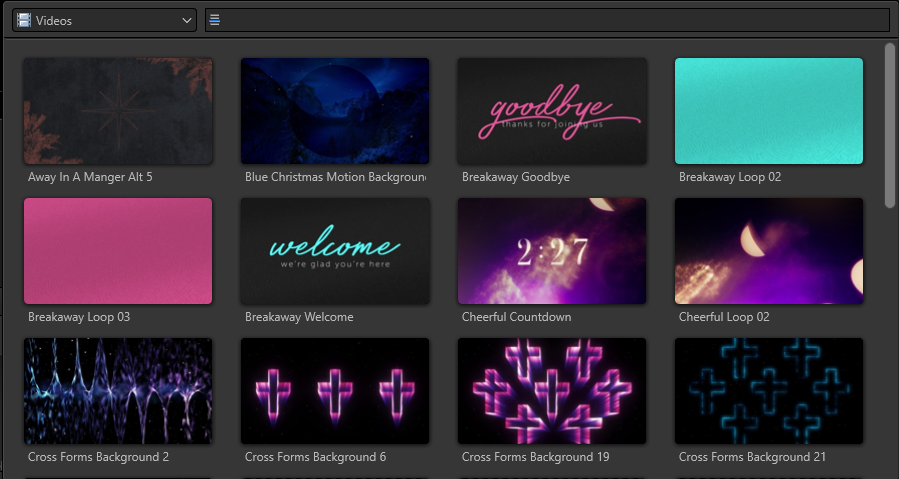
Background: Media Fill |
When selecting Media Fill, click Select Media... to add your desired background media.
|
|
Media Usage |
This is only visible when using a Media Fill for your background. Select whether you want it to display as a Background or a Foreground. Background: This is the Default setting. Selecting Background will keep the media in the back of all elements and will automatically loop between slides. It will also automatically stretch the media to fit the slide if the resolution is different than the live output. Foreground: Selecting Foreground will keep the item as an element on the slide. By default, Foreground videos will restart at the beginning on each slide. It will also maintain its aspect ratio. It can be arranged in front or behind other elements, but will still be considered a Foreground element. |
|
Aspect Ratio |
Sets the aspect ratio of the background fill. Selecting Auto will use the default setting which is Stretch for Backgrounds and Maintain for Foregrounds. Selecting Stretch will stretch the image or video to fit the selected element. Selecting Maintain will maintain the original aspect ratio of the image or video. Selecting Zoom will fit the image or video to the selected element by zooming in, but will not stretch or distort it. |
|
Repeating |
This selector determines how a video will behave: whether it repeats (loops), or plays to the end and stops. Selecting Auto will use the default setting which is On for Backgrounds and Off for Foregrounds. Selecting Repeating On will loop or repeat the background fill video and continuously play through slides using the same background. Selecting Repeating Off will play the background fill video to the end and not repeat. |
|
Rotate |
Allows you to rotate the selected element up to 360 degrees. Enter a number manually or use the wheel by clicking and turning. Use the Use the |
|
Volume |
Adjust the volume of the selected element from 0 to 100 if volume exists. |
|
Opacity |
Adjust the Opacity (transparency) of the selected element from 0 to 100. |


Text Tab
Style:
If you don't have an element selected on the slide and you're in Words tab, under Format, you will see the Slide and Text tabs.
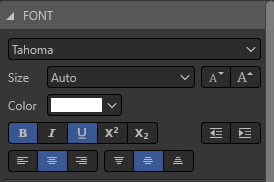
Font
|
Font Type |
Select the text box on the slide and choose the font type you want. |
|
Size |
Selecting Auto, or Resize text to fit element, will automatically fit the text into the text box up to your default font size setting that's set in the main Options. If too much text is in the box to fit, EasyWorship will shrink the text automatically so it fits. Do not auto size text: You can override the auto setting and use the drop-down menu to select Do Not Auto Size Text. This will give you a manual number size for your text. Be cautious with this! If your font size is too big, the text will extend off the slide. EasyWorship will not automatically adjust it to fit on the slide. |
|
Color |
Use the drop-down to select the color of the selected text. |
|
Format |
Choose the font styles you want; Bold, Italics, Underline, Superscript, Subscript. |
|
Intention |
Indent forward or backward with the |
|
Alignment |
Select the Horizontal and Vertical alignments. |

Outline
|
Location |
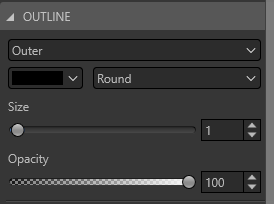
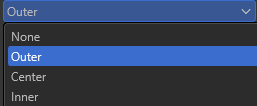
Use the drop-down menu to select the location of the Outline.
|
|
Color |
Choose the color of the selected text. |
|
Shape |
Select the shape of the outline. Whether you want it set to Round, Square, or Bevel. |
|
Size |
Select the size (weight) of the outline. |
|
Opacity |
Sets the Opacity (transparency) of the outline. |
Shadow
|
Enable / None |
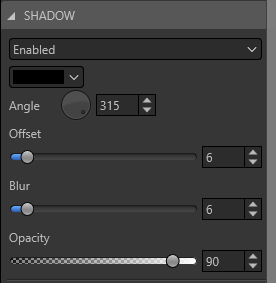
Choose whether you want to use a shadow (Enabled) or if you want it turned off (None). |
|
Color |
Choose the color of the shadow. |
|
Angle |
Set the angle of the shadow from the edge of the text. Use the wheel to set the angle or type in a value from 1 to 360 and press Enter to save. |
|
Offset |
Set the distance of the shadow from the edge of the text. |
|
Blur |
Set the blur of the shadow. |
|
Opacity |
Sets the Opacity (transparency) of the shadow. |
Bullets
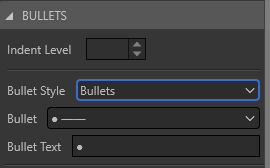
|
Indent Level |
Determines how far the bullets are indented on the slide. |
|
Bullet Style |
Select None, Bullets, or Numbers. |
|
Bullet |
Select which type of bullet you want to use. |
|
Bullet Text |
Allows you to change what the bullets look like, text or symbols. |
|
Numbers |
Select in Bullet Style to use a numbering system instead of bullets. |
|
Numbering |
Choose the numbering style. |
Layout:
Margins
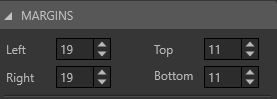
Set left, right, top, and bottom margins for your text box. The individual increments are pixels and not percentages.
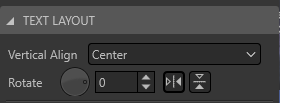
Text Layout
|
Vertical Align |
Set the alignment vertically for your text box. Choose either Top, Center, or Bottom. |
|
Rotate |
Use the wheel to rotate the text box on the slide or enter in the value manually between 0 and 360 and press Enter. Use the |
Auto Sizing
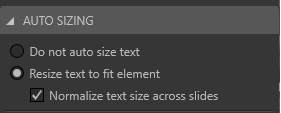
Select whether you want to let EasyWorship Resize the text to fit the element (highly recommended and default setting), or to use Do not auto size text and set the size manually (not recommended).
Checking Normalize text size across slides means that if EasyWorship has to shrink text on one slide due to the amount of text on that slide, it will also shrink the text for the rest of the slides in that song, scripture, presentation to the same size, even if it doesn't need to, so that there aren't size discrepancies between each slide.
Text Formatting
|
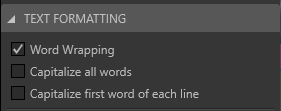
Word Wrapping |
Turns word wrapping on or off for your text box on the slide. |
|
Capitalize All Words |
Checking this box will capitalize all characters of every word. |
|
Capitalize First Word of Each Line |
Checking this box will capitalize only the first letter of each line of text. |
If you do have an element selected on the slide and you're in Words or Slides tab, under Format, you will see the Style, Text, and Arrange tabs.
An element could be a text box, Scripture, Shape, or Media item.
Style:
|
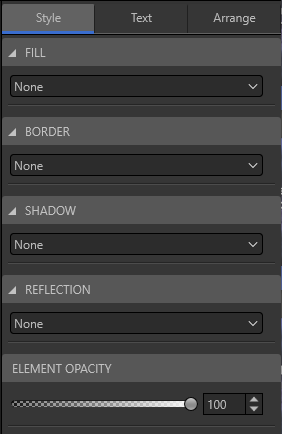
Fill |
Choose whether you want No element fill, Color fill, Gradient fill, or Media fill. Whichever fill you choose, you can make your selections accordingly. |
|
Border |
Select the border for your element. Choose None or Line. If you choose Line, set the options you want accordingly; color, shape, size, and opacity. |
|
Shadow |
Select the shadow for your element. Choose None or select the shadow location. Also, select color, angle, offset, blur, and opacity. |
|
Reflection |
Select the reflection for your element. Choose None or select the reflection location. Also, select size, distance, blur, and opacity. |
|
Element Opacity |
Select the opacity (transparency) of the element itself. |
Text:
SEE Text Tab above
Arrange:
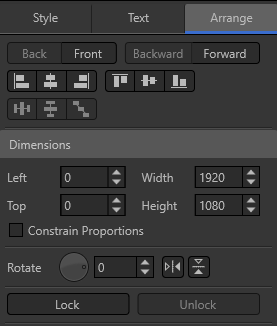
- Use these buttons
 to move the selected element to the back or the front or move it forward or backward in the order of layers.
 - Use these buttons
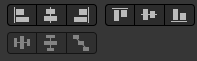 to set the alignment for the selected element, vertically or horizontally. Use the lower row of buttons to set the alignment of multiple elements on the slide.
 - Use the Dimensions to place the selected element on the slide using pixel placement.
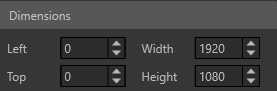
- Check Constrain Proportions
 to keep the aspect ratio of the selected element when resizing it.
  Rotate the selected element using the wheel or by entering a number between 0 and 360 and press Enter. You can also flip the selected element horizontally or vertically.
 - Lock the selected element so it can't be edited.
 Select Unlock when the element is locked to unlock it and continue editing it.
Formatting Media Element:
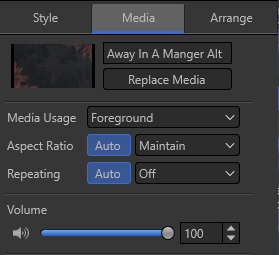
All settings for formatting media elements are the same as editing a text box, except there will be a Media tab instead of a Text tab.
|
Media |
Edit the Title of the media or click Replace Media to select a different media item. |
|
Media Usage |
Select whether you want this element to be a Foreground or Background. |
|
Aspect Ratio |
Select if you want this element to maintain its aspect ratio, stretch to fit the slide, or zoom in to fit the slide. Auto for media elements will default to be a foreground (unless it's specifically set in the media item to only be a background). |
|
Repeating |
If the element has timing, select if you want it to repeat (loop) or if you want it stop at the end. Auto for media elements with timings is repeating Off. |
|
Volume |
If the element has audio, set the volume from 0 to 100. |